
0 Views· 04 October 2022
Making A Finger Plane | Lost Wax Casting
A finger plane is a tiny woodworking plane typically used by luthiers, so violin and guitar makers. The old one I have was indeed given to me by a violin maker. Since I got it I found myself using much more frequently than I expected and pretty much all the time I work with wood! Therefore I deciced to make another one myself with a flat bed and straight blade to have an alternative to my old rounded one.
If I had to guess I'd say the old one was machined instead of cast but to me any excuse to practice some lost wax casting is good fun and doing it this way made it possible to brand it with my initials, which is always cool!
To design this finger plane I used Fusion360, you can download the model for free here:
http://blackbeardproject.com/free-downloads/
The model has then been printed on a cheap resin 3D printer that is capable of producing stunning details, great for lost wax because it require pretty much no post processing. I got mine here:
https://blackbeardproject.page.link/D100
(Yes, affiliate link)
Index of operation and materials:
0:10 3D modeling in Fusion360
0:40 3D printing in resin with Orbeat D100
1:10 Cleaning excess resin with ultrasonic cleaner and isopropanol
1:28 Removing support material before curing
1:43 Curing the resin with UV light
1:57 Flattening area with support marks with sandpaper
2:06 3D printed custom box for silicone mold making
2:09 Pattern is placed on clay to make a two part mold
2:30 Separation line cleaned and smoothed with rubber brush
2:42 Registration marks to help the two parts of the mold lineup
2:50 Release paint applied to all surfaces in contact with silicone
3:08 Mixing and pouring two part silicone (specific for molds)
4:00 Same steps for the other half of the mold
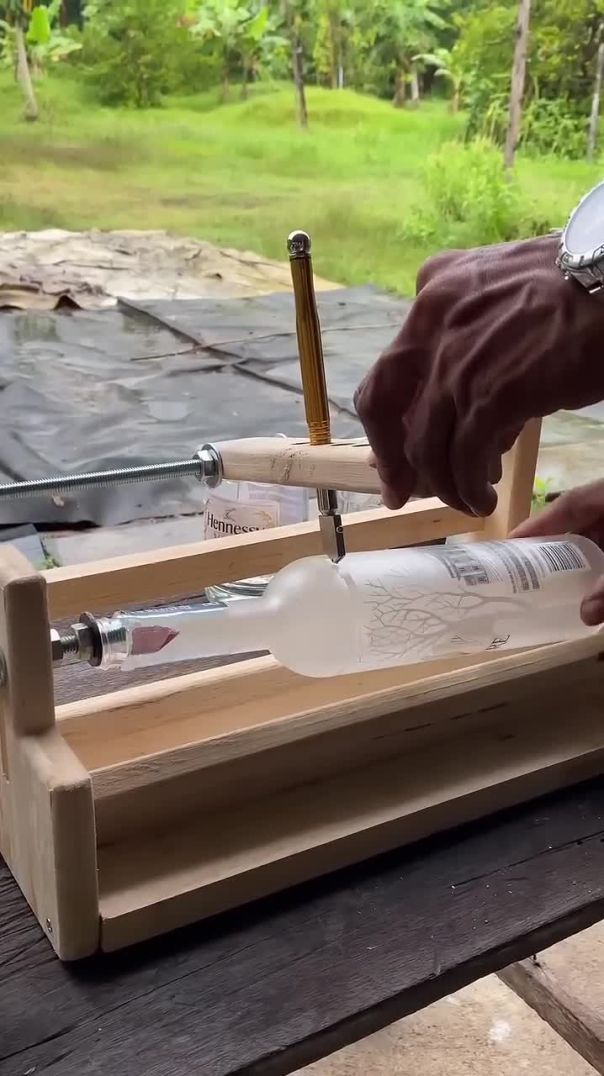
5:14 Cutting off a gate for the wax to flow in
5:45 Pouring molten wax
6:03 Wax copy complete
6:17 Adding a foam sprue and securing it with more molten wax
6:41 Fixing everything to the base of the flax with a bit of hot glue
6:47 Adding vent channels made of wax
7:11 Regular plaster lightly brushed on
7:45 Flask sealed and connected to the base, it's just a can with holes
7:55 Mixing plaster with fine sand 1:1 ratio and filling the flask
8:20 cleaning the flask from excess plaster, tape and lid
8:34 Flask was dried over a couple days, first at room temperature then ramping up to 120°C to fully dry it then up to 600°C just before the cast.
8:42 Melting aluminum
9:15 Cleaning the parts, I made two to have room for errors
9:43 Cutting off sprue with metal cutting band saw
10:03 I have no idea about why this aluminum blob came to be, possibly a air bubble in the flask.
10:14 Removing bulk excess material with 2x72 belt grinder
10:35 Drilling holes for the mouth of the plane
10:45 Cleaning some hard to reach areas with a burr on the rotary tool
11:07 Refining shape of the mouth with needle files
11:20 Drilling pilot holes for the pin
11:29 Match drilling with the appropriate size bit
11:36 Polishing the pane with cotton wheel and fine polishing compound
11:56 Riveting a brass pin in place
12:20 Cutting blade blank from an appropriate thickness 15N20 steel bar.
12:30 Grinding to size and beveling on 2x72 belt grinder
12:50 Heat treating the blade with a blow torch. Quenching in oil and tempering to straw color. Sanded and sharpened off camera
13:40 Ebony wedge made to fit from a scrap piece off camera
Everything stay in place just with friction.
Thanks a lot for watching, I hope you liked the video!
Suggestions and comments are welcome.
Leave a like and share to anyone who might be interested!
And be sure to subscribe and ring the bell if you are new here so you don't miss upcoming projects!
★Patreon★
https://www.patreon.com/blackbeardprojects
★Website★
http://blackbeardproject.com/
★Follow me★
Facebook ► https://www.facebook.com/BlackBeardProjects/
Twitter ► https://twitter.com/BlackBeardProje
Instagram ► https://www.instagram.com/black_beard_projects/


Why France's 'Lost' Marble Costs 20 Times As Much As White Marble | So Expensive | Bu


Up next
Why France's 'Lost' Marble Costs 20 Times As Much As White Marble | So Expensive | Bu
0 Comments